
Home improvement projects have been a favorite quarantine activity for many people. These projects can range from a small decor change to a full-blown renovation project.
Maybe you’re simply tired of looking at the same home furnishings day-in and day-out, or perhaps you’re looking for a change that will provide a greater return on your home’s value.
Whatever your goals may be, there are ways to go about your home improvement project on a budget. You might want to factor the size of the room you are trying to remodel into the cost, and perhaps research common expenses you may encounter to prepare yourself for renovating your home.
The Kitchen
The kitchen is generally a good starting place for making renovations to your home because it is one of the most used and valued spaces in the entire house. We’ve all seen pictures of houses online that are seemingly perfect, until seeing the dreaded kitchen photo that easily gives the home’s age away.
Although you might not have tens of thousands to splurge on gutting the kitchen, there are some budget-friendly, and even renter-friendly, changes you can make that will spruce up the modern feeling in your kitchen.
Paint the cabinets
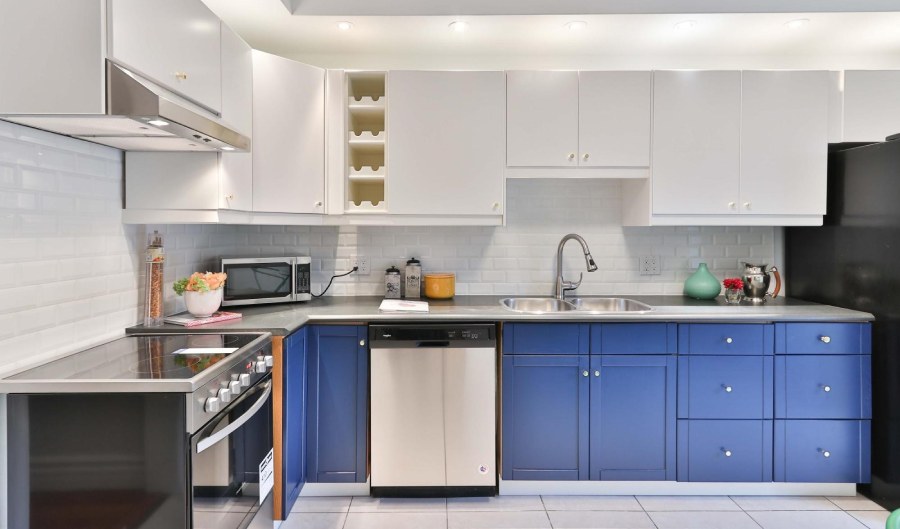
Photo by Sidekix Media on Unsplash
If you’re a renter, you’re going to want to check in with your landlord to explain your desire to them and get their approval before painting any of your kitchen cabinets. They might ask what color you had in mind, or offer tips and suggestions on how to best go about the project. Luckily, it is fairly inexpensive to purchase sanding paper or sanding bricks and stain or paint varnish.
You’re going to want to start with a rough sanding grit on all surfaces of the cabinets and work your way to a fine grit that will leave the cabinets feeling soft. It’s okay if the current finish comes off while you’re sanding, it is going to be covered later on. Make sure to wipe away any debris or dirt along the way and remember to sand in the direction of the grain of the wood.
After sanding, you can choose a wood stain for wooden cabinets or a paint finish if you want a bold pop of color. Now would be a good time to use painter’s tape to mark off the cabinets to keep your work looking nice and neat. Just like with sanding, you want to paint and stain in the direction of the grain of the wood. Depending on the look you’re going for, you can do one coat for a lighter wash of color or more coats for a deeper opacity. Another option is to add some water to the paint and it will create a “washed” color effect, allowing some of the natural wood grain to shine through.
Once you’ve finished staining and painting, let the cabinets dry and follow up with a sealant like polyurethane to protect your hard work!
Update the backsplash
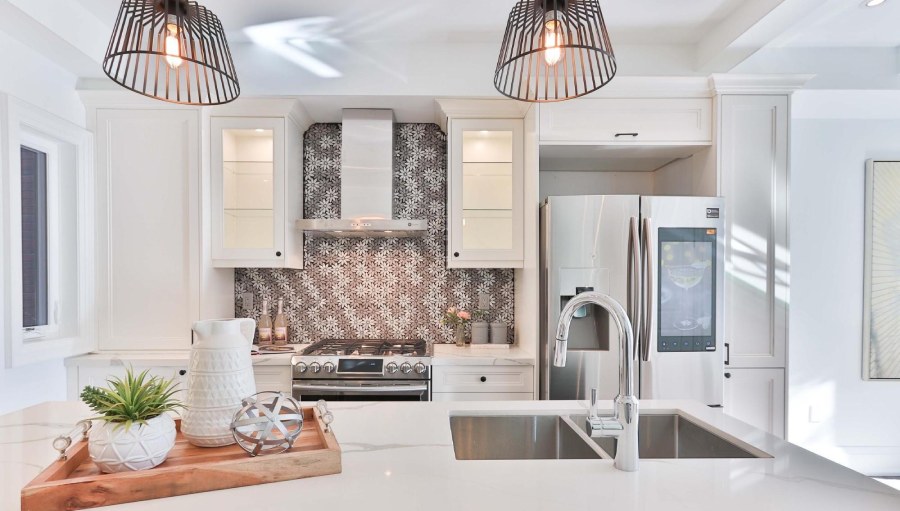
Photo by Sidekix Media on Unsplash
The backsplash surrounding your kitchen appliances can make or break the overall look of your kitchen. When done poorly, it can easily look outdated or mismatched to the other elements or colors used in the room. Luckily, this project is budget friendly, and there are quite a few exciting types of backsplash available for your kitchen.
If you’re a renter, you might not actually have any backsplash in your kitchen. This is perfectly fine, except for that one instance where you decide to make a red pasta sauce and accidentally stain the wall. To protect the paint job in your kitchen and add a little personality to the space, you can add faux-backsplash contact paper to the walls that can peel off when you need to move out. This option is inexpensive, requires very little technical skill, and is flexible enough to work with most spaces.
If you’re searching for kitchen style inspiration, this trend has been made popular through DIY YouTubers and on Pinterest, so check those sites out for more ideas. If you’re a homeowner and you already have a backsplash that needs a pick-me-up, you can use a hammer and a putty knife to gently separate the tiles from the walls. Make sure to clear everything out of the way on your countertop to make sure no grout or tile debris makes its way into your food prep area!
Once completed, you can check your local recycling center to see if they will accept the old tile to help reduce waste, and you can then work on patching any holes in the walls with putty and begin putting up the new backsplash!
Change the knobs and handles
Changing out the knobs and handles is easily the most overlooked project you can do to modernize your kitchen on a budget. Typically, small and round knobs tend to make a home feel older and more rustic or vintage. If you like the newly popular Cottagecore or vintage aesthetics, then perhaps keeping round, crystal knobs with a gold finish will suit your style.
If you prefer mid-century or modern decor styles, stick to long, slender handles for your cabinets and drawers. A matte black finish has become very popular in the past few years, and some take it a step further by changing their faucet to a similar finish so that the accents match each other. This style looks great if you have cool tones or even a more monochromatic color palette in your kitchen.
Instead of trying to find new hardware at a retailer like Lowe’s or Home Depot, consider visiting a furniture/home improvement consignment store. Habitat for Humanity’s ReStores sell heavily discounted home improvement items and building materials that are much less in price than what you would pay at your local retail store.
The Bathroom
The bathroom is often the easiest space in the house to become outdated. You can easily renovate this space on a budget and in renter-friendly ways.
Refinish the tub
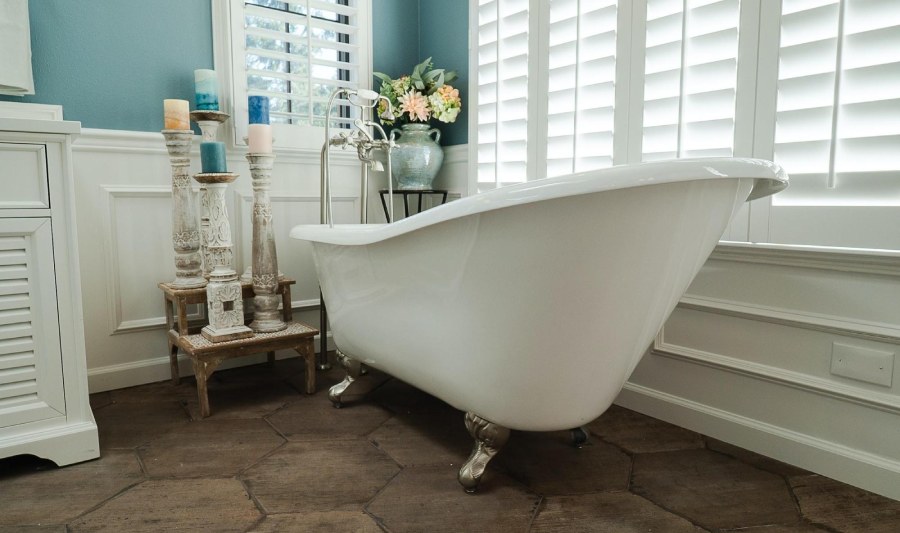
Photo by Nik Owens on Unsplash
A common outdated feature in a bathroom is a colored tub reminiscent of the 90s or even earlier. Think powder pink, blue, and cream colors. Most modern house builds opt for a white bathtub that better fits the times.
Thankfully, changing the color of your bathtub no longer means having to invest in a completely new tub. Depending on if yours is acrylic or porcelain, you can pick up specialized refinishing kits made specifically for bathtubs and showers for the exact purpose of repainting the fixture. Be sure to check the durability of the method you choose to use for this project because you don’t want to accidentally scuff or leave marks on your tub. A refinishing kit can easily save you hundreds, if not thousands, of dollars on investing in a completely new bathtub.
Update the lights and fixtures
Older vanities might have unflattering, harsh lights with outdated light covers—unappealing to say the least. If you like the look of your lights, perhaps the easiest and most cost-effective change to make in the bathroom is to buy bright white light bulbs for a natural light that mimics sunlight. Soft, warm light tends to be the default in many homes, but may be unforgiving depending on how the room is styled.
Gold fixtures in the bathroom tend to be associated with older homes, so it might be worth looking into modernizing the faucet and taps in your bathroom. Much like the kitchen, matte black accents are having a moment right now and are a great way to make the two spaces look more cohesive.
Install a new tile floor
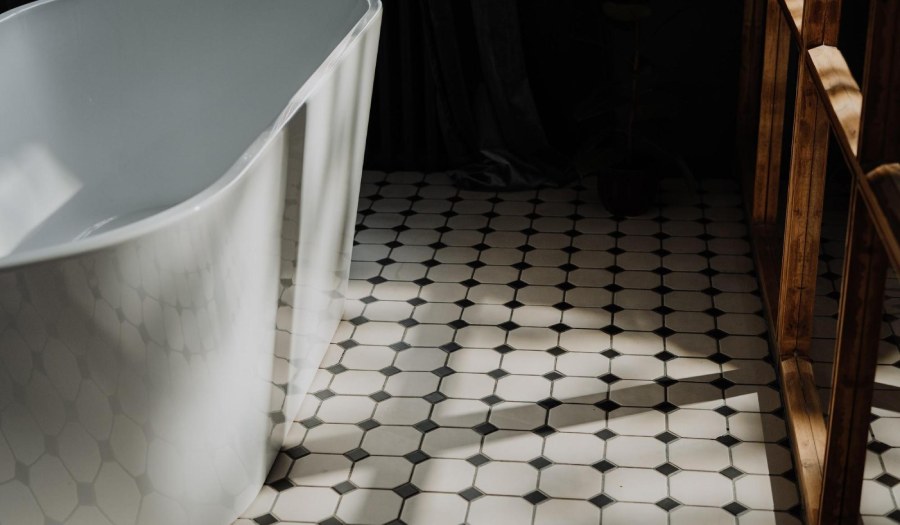
Photo by cottonbro from Pexels
At first glance, this seems like a true renovation project and not something that can be done on a budget. However, this is far from the truth. There are tons of laminate floor brands that have become popular through social media for offering fun and easy-to-install contact paper flooring.
These options are renter friendly, budget friendly, and best of all, you don’t need to cut or damage any of your existing flooring to install a new design. Be sure to find a material and pattern that is waterproof, because this will be vital to the flooring’s durability in your bathroom.
The Bedroom
Some might think that to update your bedroom you need to splurge on high-end furniture and expensive artwork, but that couldn’t be further from the truth. A few thrifty changes can easily help bring the bedroom together in a fun and new way.
DIY headboard
Something that makes a bedroom stand out is the frame and headboard the mattress lays on. Not only will a new headboard make your bed look like it belongs in the space, it will also serve as a way to honor your sleep space as separate from the other places you might lounge in around your home.
There are tons of headboard options to choose from, and a few popular ones that are common to DIY include a tufted fabric headboard and a herringbone-patterned wood headboard. Both of these can be seen all over Pinterest and YouTube and have many easy-to-follow tutorials for beginner DIYers.
Thrift end tables
If you want to spice up your furniture game but aren’t living on a West Elm budget, try thrifting your next furniture piece! End tables are a great way to frame your bed and provide storage for your morning and evening essentials.
If you have a quirky style, you could opt for two mismatched end tables that have similar elements that tie them together in your space. You could also aim for just one end table if your bed is situated in a corner; this would give you a chance to paint it and decorate it to fit your style!
Add a wallpaper accent wall
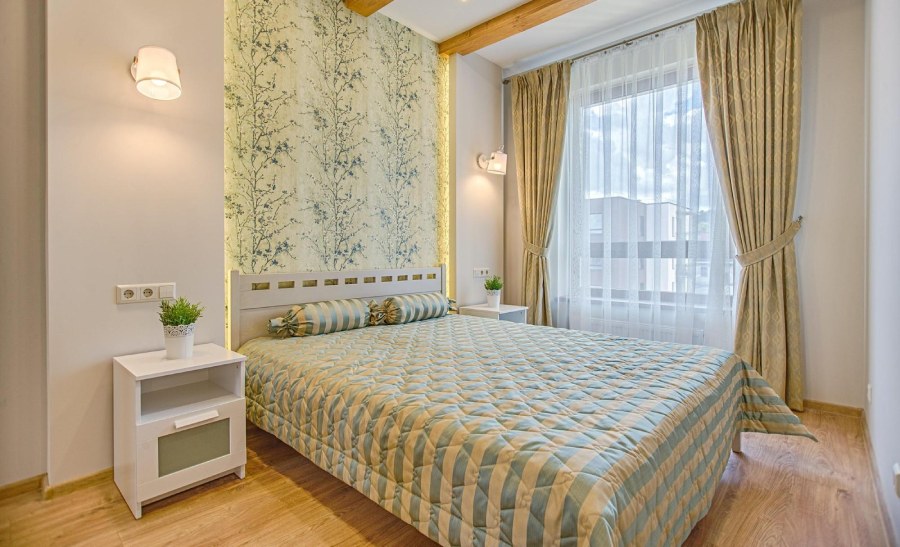
Photo by Vecislavas Popa from Pexels
An inexpensive way to add some personality to your bedroom is to add wallpaper to create an accent wall. Wallpaper is a great way to try out a new pattern or design you might want to experiment with, and it can easily add more warmth to the space.
For renters, modern wallpaper companies make contact paper options that are mess free, damage free, and easy to install. What’s great about wallpaper is that there are hundreds of unique designs to choose from that you can match to your personal style, the furniture in your room, and even the existing paint color.
The Living Room
One of the most daunting rooms to redo is the living room. It’s a high-traffic area that becomes cluttered and messy quickly. Homeowners often run out of space for their gadgets and toys for pets or kids in the living room, and can easily feel overwhelmed in their own space. Luckily, there are some space-saving projects you can do to help declutter and de-stress your living room.
Install media center build-ins
Most people tend to flock toward their TV in their free time, but the space around the TV is often neglected. There’s the DVR, video game consoles, cords—you name it—all taking up space around your viewing area. If you’re a homeowner in need of more storage space for your TV and electronics, you might want to consider building a media center or a media console.
A built-in is generally attached to the wall, which will make it a bit more sophisticated of a project. Once you’ve decided on the built-ins you’d like to add to your home, be sure to drill anchor holes into studs in the wall to keep the furniture from tipping over. Once it’s installed, you can mount the TV and you’re done! Built-ins add a focal point to the space, drawing the eye toward it, which can help create a defined area for odd-shaped living spaces.
Once it is installed, you can find a home for all your odds and ends, keeping clutter out of sight and maximizing your space!
Utilize smart home technology
Another way to modernize your living room is by adding smart repcalgaryhomes technology. This could be as simple as purchasing a voice assistant like Alexa to help create routines to make life a little easier or to help remind you of things you have on your to-do list.
Upgrade the couch and coffee table
If you’re stumped on what exactly might be off about your living space… maybe it’s the couch! The more we sit and lounge on the couch, the faster it gets dirty and grimy. If you have pets, they surely leave their mark with scratches and fur all over the furniture. An easy way to update your living room is by investing in a new couch and coffee table that can make a stale space feel new again.
Discount furniture stores offer utilitarian furniture options that are great for your wallet. Although they might not boast the trendiest designs, these options are great in a pinch when you need to fill a space. Wayfair and TJ Maxx both offer budget living room furniture that are on point with current trends as well.
The Mudroom
If you’re fortunate enough to have a mudroom or laundry closet, you’ve probably realized how quickly it becomes dirty, fitting to its name. It’s typically a high-traffic area connecting the garage or outdoor area to the rest of the home, and generally tracks the outdoor elements in with it. Many families recognize a pile-up of dirt, winter gear, and clutter in the mudroom, but don’t know how to find a solution to the problem. Here are some inexpensive ways to go about organizing the chaos.
Use a DIY storage/organization solution

Photo by Douglas Sheppard on Unsplash
There are reasons why Marie Kondo and closet organizers have become popular; it’s because their methods work! Take some time to assess what you need to store in your mudroom or laundry area, and how you think it would be best organized. You can purchase smaller closet systems from home improvement stores and assemble them yourself to save money.
Alternatively, you can buy cubbies and baskets, and personalize them to the items stored within them for ease of mind. A shoe rack or organizer is a good idea for someone who wears different pairs of shoes frequently or would like a way to separate spring/summer shoes from fall/winter shoes.
Install a built-in bench
Dedicating an area in your mudroom for taking off and putting on outdoor gear is a great way to stop clutter from building up. It also gives you an area to put your shoes on and take them off, limiting the amount of dirt that can spread throughout the home.
If you’re handy with woodworking tools, you can try and create a built-in bench from scratch, or look to stores like Ikea for inexpensive and functional benches. One benefit to a bench is that you can typically store bulky items like winter gear inside it, so as to not distract from the space.
Add a wall-mounted drying rack
If your mudroom also doubles as your laundry room, you might want to consider installing a drying rack to the wall. A lot of people choose to air dry some of their clothing, and, unfortunately, drying racks take up a lot of valuable space. With a wall-mounted drying rack, you can easily conceal the rack when it isn’t being used, which again helps free the space visually.
Hopefully, these ideas inspire your next home improvement project this year. As home projects become more popular, DIY beginners and hobbyists alike can find more and more DIY tutorials for these projects on YouTube or other similar places. No matter your budget, there is always an option to better your home, whether it be through buying new furniture, spray painting decor a new color, or repurposing something already existing in the home.
For more ideas to inspire your home renovations, check out our article on 10 home improvements that increase your property value.