


In some cases, it becomes very important to erase iPhone completely. Before seeking a suitable solution for how to erase iPhone without Apple ID, it is necessary to understand the reasons why you need to erase your iPhone.
- Preparation for Resale or Trade-in: When preparing your iPhone for resale or trade-in, wiping your iPhone is a necessary step to ensure a smooth transition to the next owner.
- Changing Apple ID: When you switch to a different Apple ID, wiping your iPhone lets you use your new account for a fresh setup.
- Troubleshooting: In the event of an ongoing software problem or malfunction, restoring factory settings can be used as a troubleshooting step to resolve various issues.
How to Erase iPhone Without Apple ID in 2023
If you have to erase your iPhone, the first thing that you should do is to backup iPhone on Windows PC and then follow the following methods to erase iPhone without Apple ID.
Method 1: One-Click to Erase iPhone with FoneTool – Safe Way
Your iPhone passcode is an important safeguard for protecting your privacy. However, in some cases, you may need to erase your iPhone without a passcode for personal reasons. FoneTool is a good option for you in this case, which is a safe and professional backup tool that cannot only help you back up or transfer your iPhone data but also erase your iPhone thoroughly and irreversibly without Apple ID.
Why choose FoneTool to wipe your iPhone clean? Some common reasons are as follows:
- Comprehensive Data Erasure: FoneTool ensures that all data on your iPhone is deleted completely securely and without leaving any trace.
- No Passcode Required: Even if you’ve forgotten your iPhone passcode or can’t access your device, FoneTool erases it in just a few clicks.
- Permanent Data Removal: You can rest assured that data deleted by FoneTool is permanently unrecoverable, ensuring that your data is safe and ready for resale or reuse on your device.
How to erase iPhone without Apple ID using FoneTool? Here is a step-by-step guide:
Step 1: Launch FoneTool > Connect your iPhone to the computer using a stable USB cable.
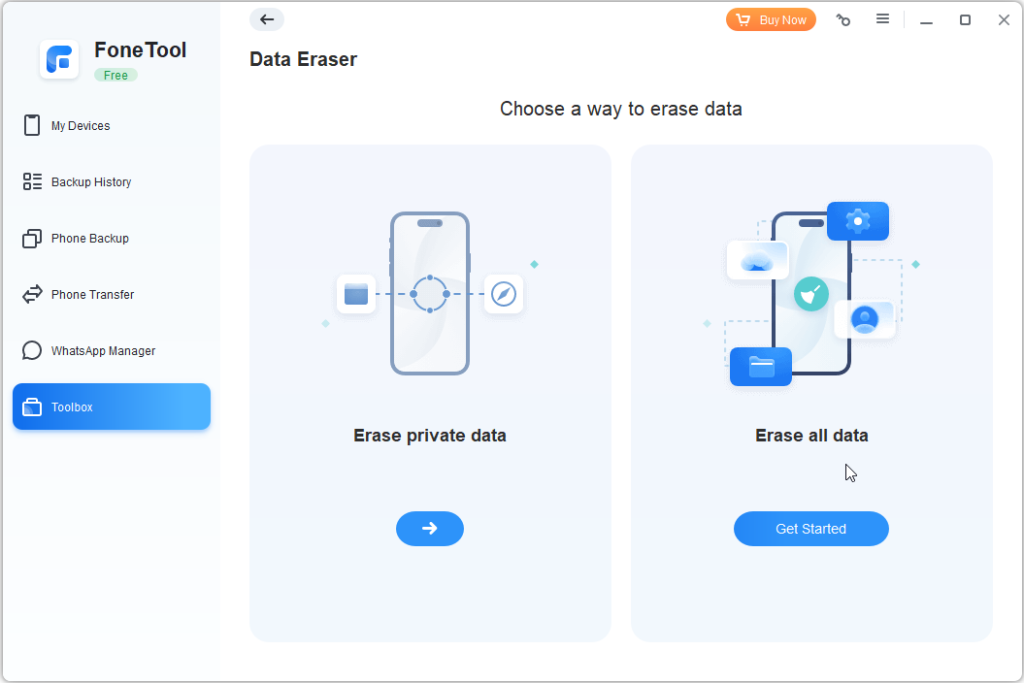
Step 2: Navigate to the Toolbox section from the left pane > Choose Data Eraser > Erase all data > Click the Get Started button.
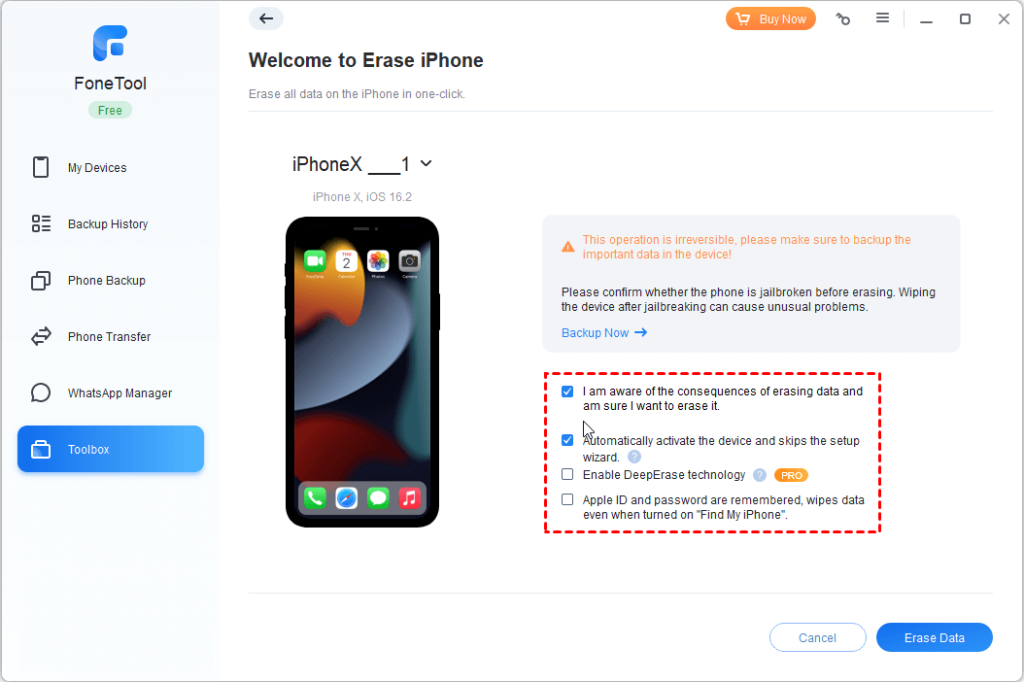
Step 3: Checkmark the options according to your requirements > Click Erase Data to begin the process.
Method 2: Wipe iPhone Without Apple ID by iTunes
If you don’t want to install and use any third-party software, an official way to wipe your iPhone clean is to use iTunes. When you encounter a situation where your iPhone is locked due to a forgotten passcode, wiping the device using iTunes becomes a viable option, if you have previously synced your iPhone with iTunes.
To successfully wipe your iPhone using iTunes, follow this comprehensive guide:
Step 1: First update iTunes on your computer to the latest version and launch it > Once updated, connect your iPhone to your computer.
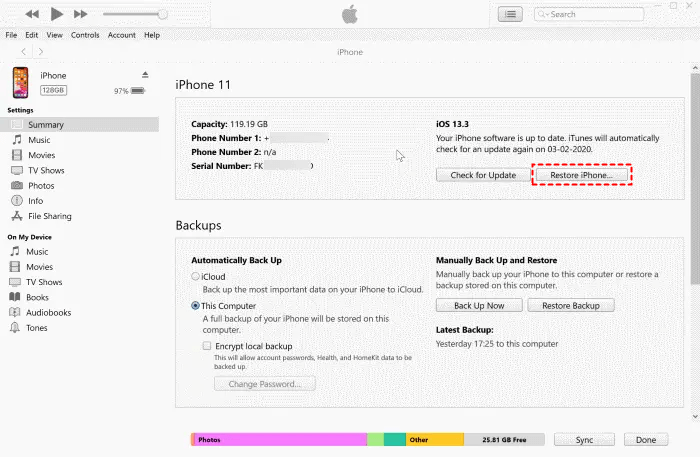
Step 2: Click the phone-shape icon and then click Summary > Select the Recover iPhone… option > Once selected, all data on your iPhone will be erased.
Method 3: Factory Reset Your iPhone via iCloud
Leveraging iCloud to reset your iPhone proves to be an excellent method, particularly when confronted with the unfortunate circumstance of accidentally misplacing your device. This method allows you to remotely wipe your iPhone, providing a solution if you forget your passcode. Follow these simple steps to reset your iPhone via iCloud:
Step 1: Access www.icloud.com/find > Log in with your iCloud ID > Click Find My iPhone.
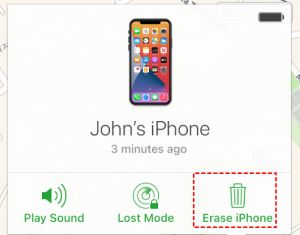
Step 2: Choose the All Devices option > Locate your locked iPhone > Select it.
Step 3: Click Erase iPhone to initiate the wiping process, which will completely erase all data from your iPhone.
The Bottom Line
Upon reading this guide, you’ll discover how to erase iPhone without Apple ID. To ensure the utmost data safety, FoneTool is the best option for you. With FoneTool, you can also back up your iPhone to PC or USB drive, transfer data to new iPhone with one click, delete duplicate photos on iPhone or PC, etc. Why not try it out? Download and use it at once!


